More than five years ago, when I retired my desktop Motoko, I thought I was done with desktops for good. Reasons for eliminating desktops from the “fleet” had ranged from size to dust to depreciation, but boy have times have changed. In early 2014 I replaced my T430 with the DC53427HYE, and that addressed all the previously mentioned concerns about desktops. In fact I even upgraded that to a better version of the same thing in 2015.
In late 2015 I started playing World of Warships, and ultimately became enamored with playing with all the settings turned up at 1080p. WoWS is not a particularly demanding game at 1080p, but I still needed to borrow my brother’s desktop with the Q6700 and HD6850 to max it out; my ThinkPad Yoga with the i5 u4300 can barely handle the *lowest* settings at 1080p. I was/am also in the process of playing Tales of Zestiria on the C2Q desktop. So, in the late summer of 2016 (now) after borrowing it for far too long, I finally decided to look at rolling my own.
So, where to start? I felt that the Q6700 and HD6850 combination was struggling to run WoWS maxed: I would usually get 30fps, but now and then it would stutter in difficult situations. I wasn’t entirely sure if it was CPU or GPU limited, so I started speccing it out by seeing what level of hardware I would need to improve CPU and GPU power by around 50%. I zoned in on some CPU and GPU options with educated guessing and cross checking against Passmark CPU/GPU benchmark lists. Then I tried to find which options in said performance range also had the best combination of low price and low power consumption.
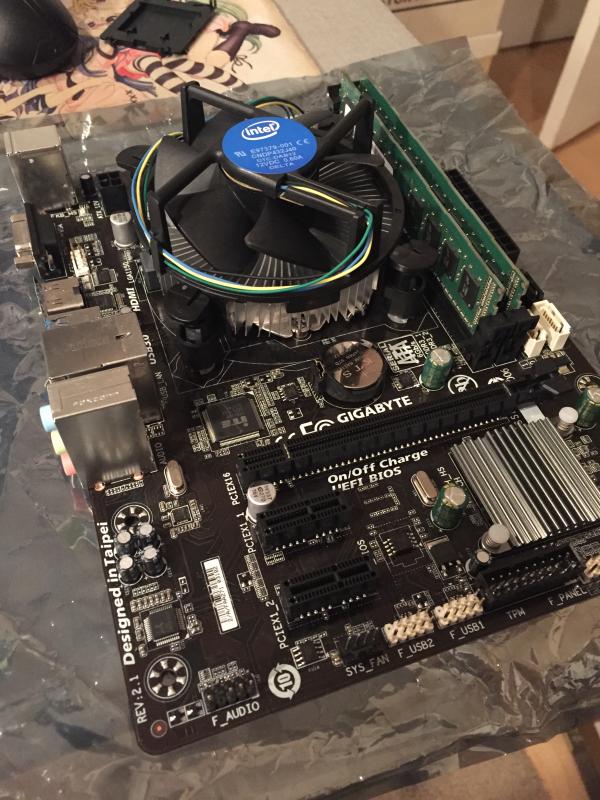
I eventually settled on the CPU and GPU combination of the i3 4130 and GTX 750 Ti. Both parts have rated TDPs around 60W and cost about $80 if you look hard enough. DDR3 memory is also extremely cheap for low-end 2x4GB kits. More importantly, and more on this in a sec, both of these parts had cheap SFF options: the 4130 in the form of cheap mATX motherboards, and the 750 Ti in the form of ‘short’ PCB models.
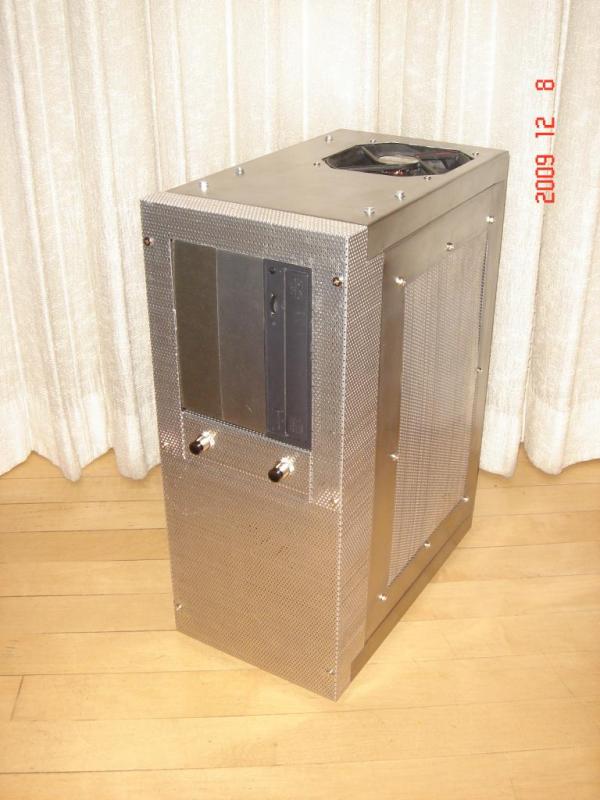
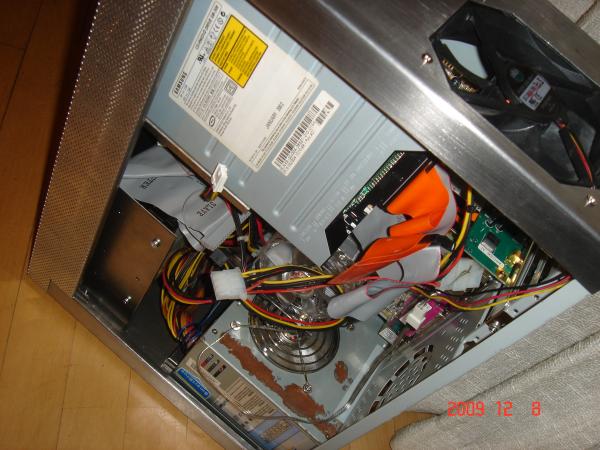
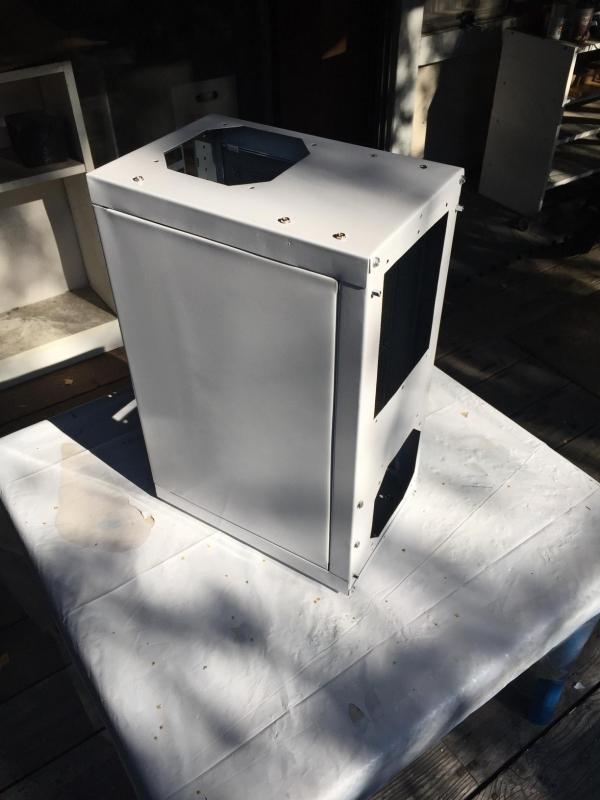
It was when I was having fun cheaping out on the build that I realized it was finally time to use the Pro Kwality Case. The PKC is a custom SFF tower that I made for a class in college: it basically allows you to put a full-ATX system with multiple GPUs into a shorter (front to back) than average chassis by sacrificing the optical drive and limiting the number of 3.5″ hard drives (alternatively you could configure an optical drive and more 3.5″ hard drives by sacrificing discrete graphics), or that was the theory. In practice it was hard to assemble and very cramped with a full-ATX motherboard, an optical drive, and a couple expansion cards; the lack of space also meant that the wiring was a tangled mess. All of this probably contributed to pretty bad airflow, and the case seemed to dissipate heat poorly when I displayed it at the end of the class. This was late 2009. At the time I already had both Colette and Motoko set up the way I wanted… so I never used the PKC in a useful system.
But like the general desktop situation, things have changed. The requirements have changed: I don’t need an optical drive or a 3.5″ hard drive or a full-ATX motherboard. Parts availability has changed: small form-factor variants of even high-end desktop components are becoming increasingly common if not even mainstream. In this new age I was easily able to pinpoint cheap SFF components with vastly superior performance to anything I had owned before. I was also confident that these parts would fit the PKC without any clutter, and that the low net TDP would help solve the cooling issue.
So it was time to prep the PKC.
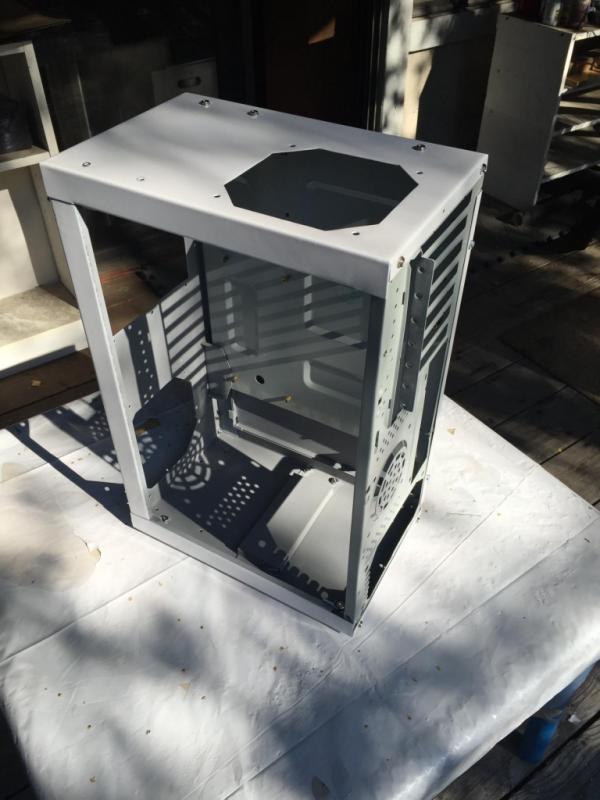
When I built the case, I did not paint it because for whatever reason all the TAs advised against it and pushed for expensive anodization instead. Relative to other projects I had a ton of parts in the case, and some of the panels weren’t of the best quality, so I would not only have to pay more than other people to anodize, but I would also have to anodize sloppy parts. Wasn’t going to do that, so I sanded all the panels good enough, and that was that. Fast forward seven years and many of the panels had developed a significant amount of rust, and if I was going to use the PKC for real, I wanted to prevent that in the future. This time, there’s nobody telling me I shouldn’t paint my damn project.
I took everything apart and spent two evenings sanding out as much rust as possible and filing down numerous sharp corners. I also sanded out scores that had been used as guidelines for cutting, and I washed all the parts. I checked what spray paints I had in stock and decided that the inside should be grey primer and that the outside should be white gloss. Painting was done over the course of many days, as I needed daylight to apply paint, and there was not much after work. All of the primer surfaces got a single coat, and all of the white surfaces got two. Where the panels were well made, the paint applied well; where the panels were not made well, the paint did not apply well. I almost ran out of primer, which would have been unfortunate because I couldn’t find the same thing anywhere. Last week the PKC finally came back together for final assembly.
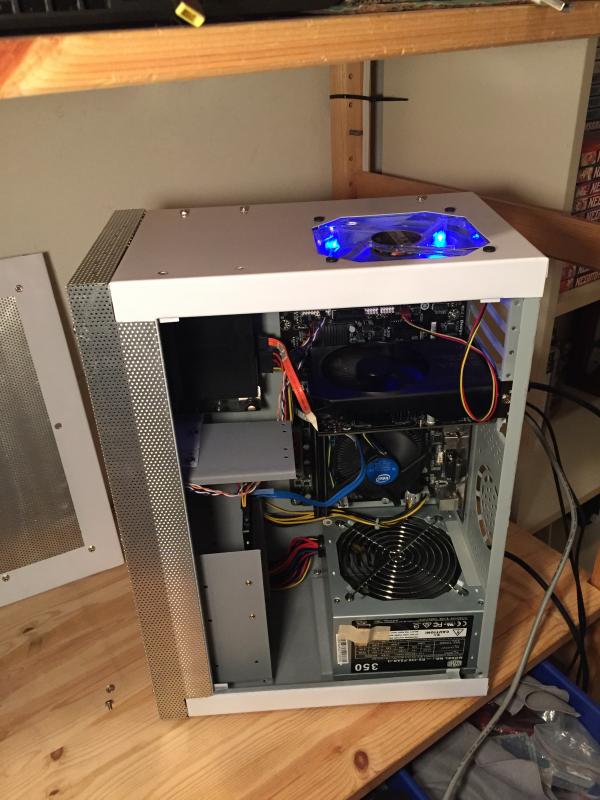
This week I was able to test fit and install all of the internals. By scouring eBay for deals I was able to get the total cost of ‘new’ parts – I’m obviously reusing things like fans, cables, SSD, etc – down to just over $200. Two hundred! A Q6700 by itself cost north of $800 at MSRP. The HD 6850 by itself cost $180 at MSRP. I cannot believe how cheap this was for the performance that I am getting. All of these parts were either used or open box:
- Intel Core i3 4130 + stock cooler: $80
- 2x4GB Micron DDR3 PC12800: $24
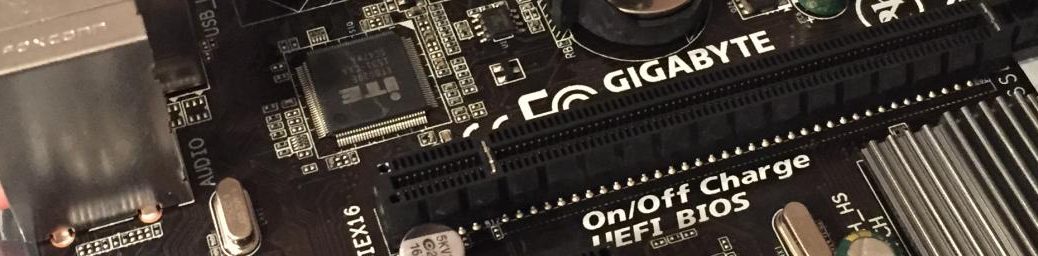
- Gigabyte GA-H81M-H mATX motherboard: $39
- EVGA GTX 750 Ti SC 2GB: $80
- CoolerMaster Elite Power 350W PSU: Free
The story behind the CoolerMaster PSU: Because the max load of the CPU and GPU would only be 120W, I was comfortable buying a cheap $20 350W unit albeit from a well-known brand. It ultimately came with a couple defective plugs, so I was able to get a refund on the unit. I then replaced the defective plugs with some effort. As far as I can tell, it otherwise works fine, but it’s one of those things where only time will tell.
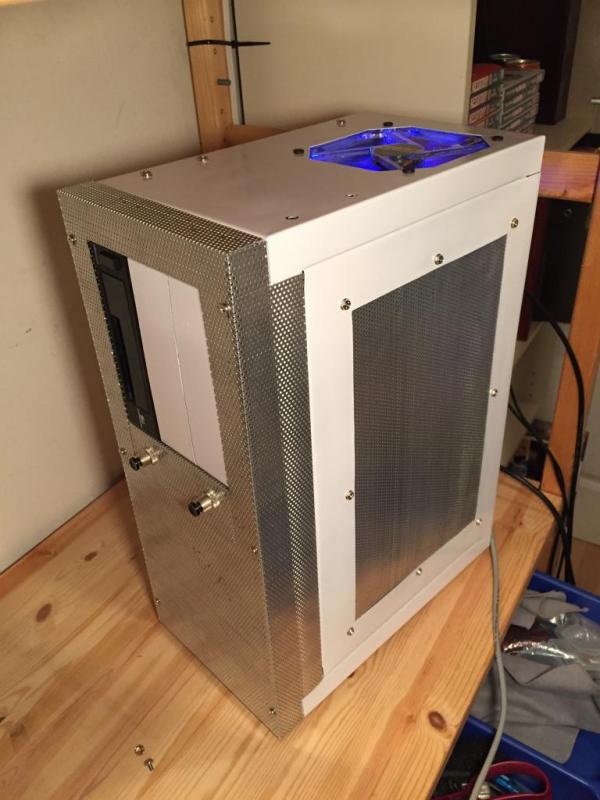
I was very happy how well everything fit in the case this time and how clean the build turned out. It is still a pain to install anything in the 5.25″ bays in the front, but I don’t have the tools to construct any new parts at this time so there isn’t too much I can do about it. Given that I’m only using one short 5.25″ device (a hot swap HDD cage) it isn’t too much of a problem. Assembly with SFF parts was so much easier than assembly with full ATX gear, and the uninspiring number and length of cables from the cheapo PSU actually made the cables very easy to hide.
So after all that, how well does it work overall?
Amazingly well!
I can run WoWS closer to 60fps now, and it even feels a little smoother when I pan in game. It’s quieter, lighter, and cleaner – in appearance, construction, and assembly- than Ted’s machine, though of course the fit and finish of the PKC isn’t nearly as good as a mass-produced machine. At full CPU and GPU load I’m pulling about 160W at the wall, and the cooling capacity of the case is enough to keep both under a moderate 70C. I’m pretty sure I can make it cooler and quieter with some tweaking, but that is an adventure for another day. For now I’m super psyched to be using a system in the Pro Kwality Case, and we’ll see how well this super budget build holds up…